 GS1 Assistant - Help Document
Bulk GTIN Assignment: Assign Barcodes to Your Entire Catalogue at Once
GS1 Assistant lets you assign GTINs to multiple products at once.
You can:
- assign your full catalogue
- assign a filtered group of products
- assign only new or unassigned variants
Before you start
Before running Bulk Assign, confirm these two things:
1. Your prefix status is Valid
Go to the Company Prefix page.
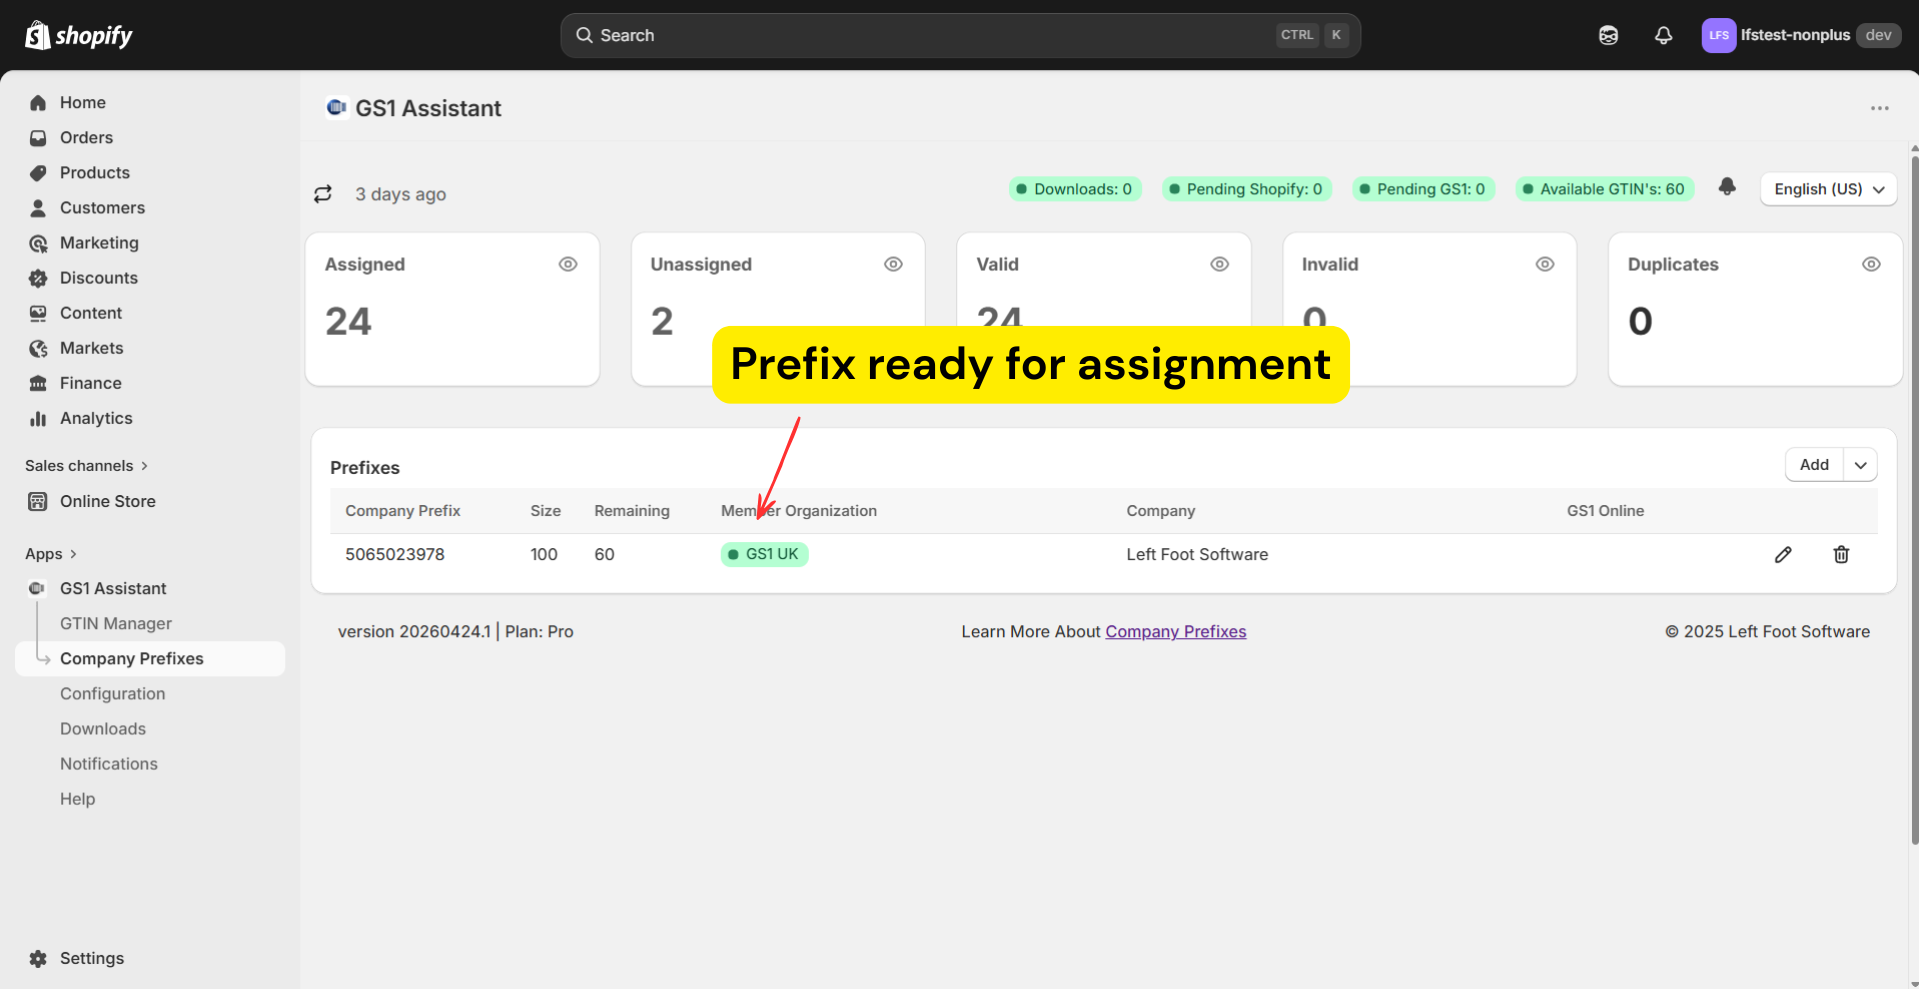
Note: If you're using a GS1 company prefix, it should normally show Valid before you assign GTINs. Internal prefixes may not display this status.
2. Your Start of Range is correct
If you already used GTINs from this prefix before:
- manually
- through spreadsheets
- in another system
- or in a previous Shopify store
make sure your Start of Range is configured correctly.
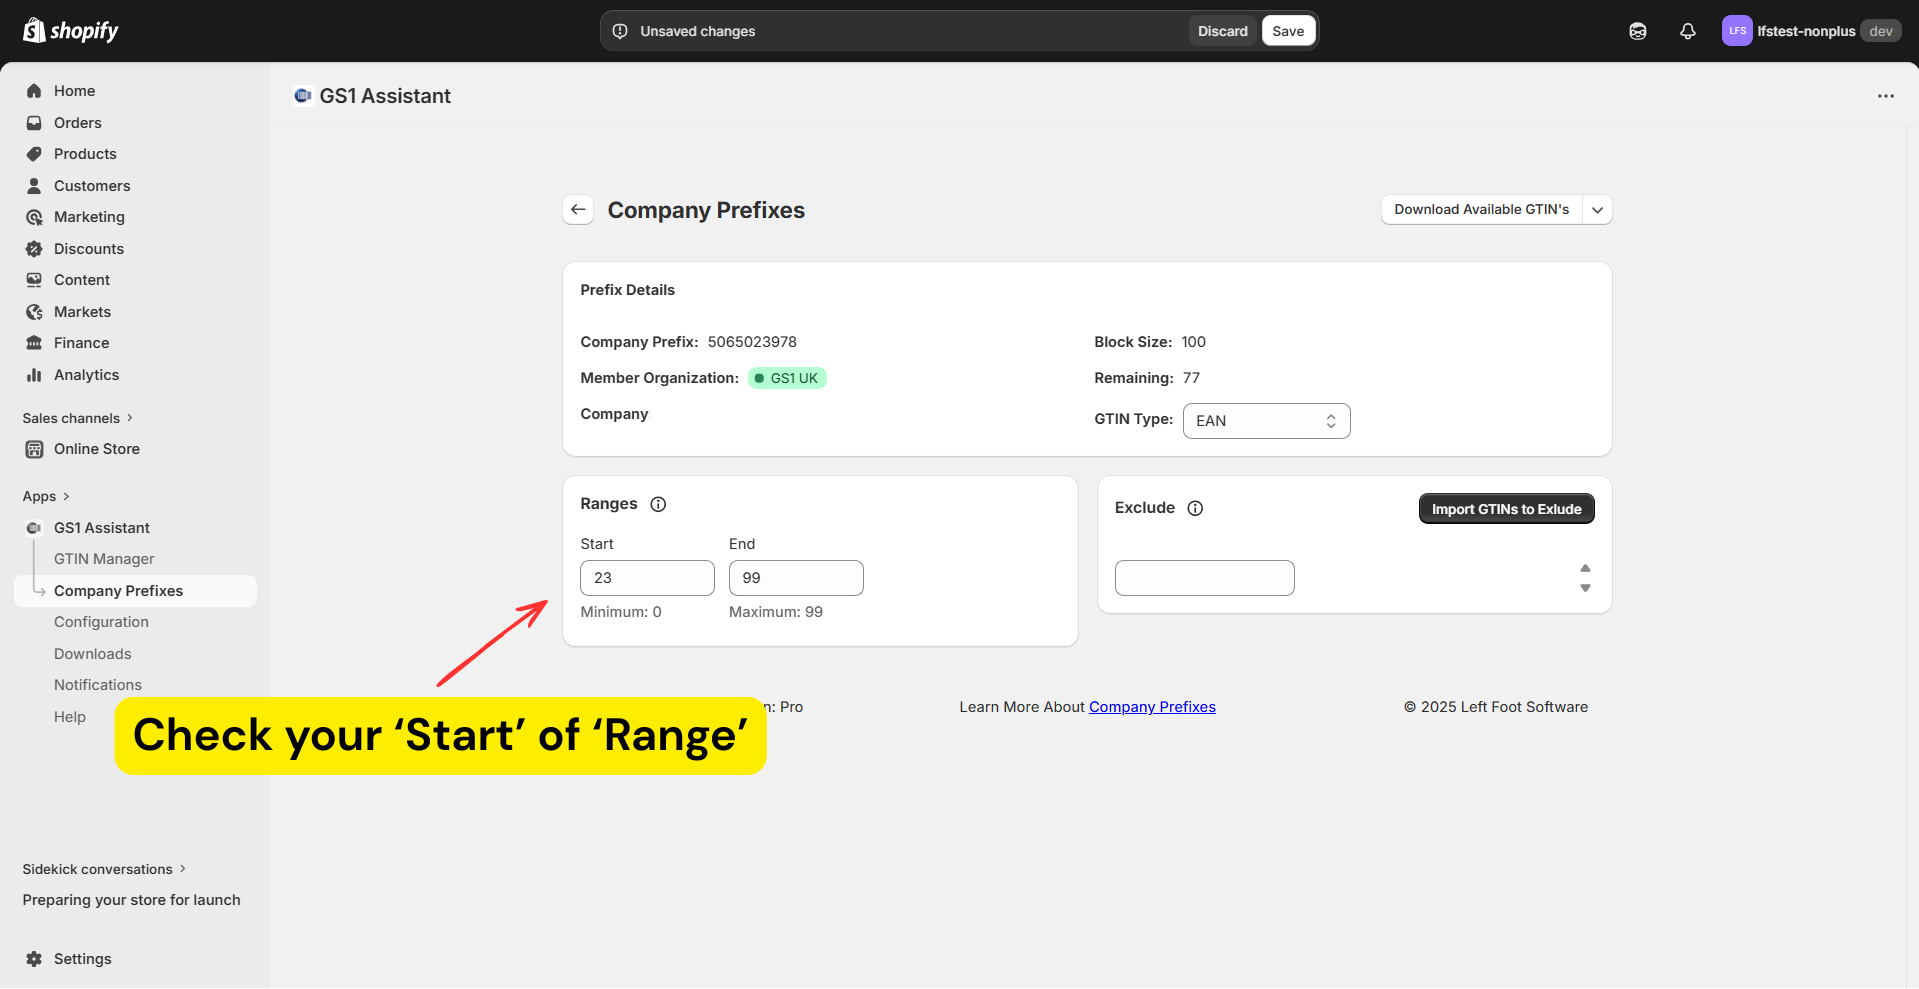
Otherwise, duplicate GTINs may be created.
Read How to Avoid Duplicate GTIN Assignments (Setting Your Start Range) if you're not sure.
Important: Bulk Assign only fills empty barcode fields
GS1 Assistant will not overwrite existing barcode values.
If a product already contains:
- a valid GTIN
- an invalid GTIN
- or any barcode value
the app skips it.
Only products with empty barcode fields receive new GTINs.
Seeing a warning about existing GTINs?
This usually means the selected products already contain barcode values in Shopify.
Even invalid barcode values are treated as existing barcodes.
To replace them:
- Remove the existing barcode values
- Run Bulk Assign again
Read: How to Remove Invalid or Existing GTINs in Bulk
Check your available GTIN count
Before assigning GTINs, check the Available GTINs count on the dashboard.
Make sure your prefix has enough remaining GTINs for the products you plan to assign.
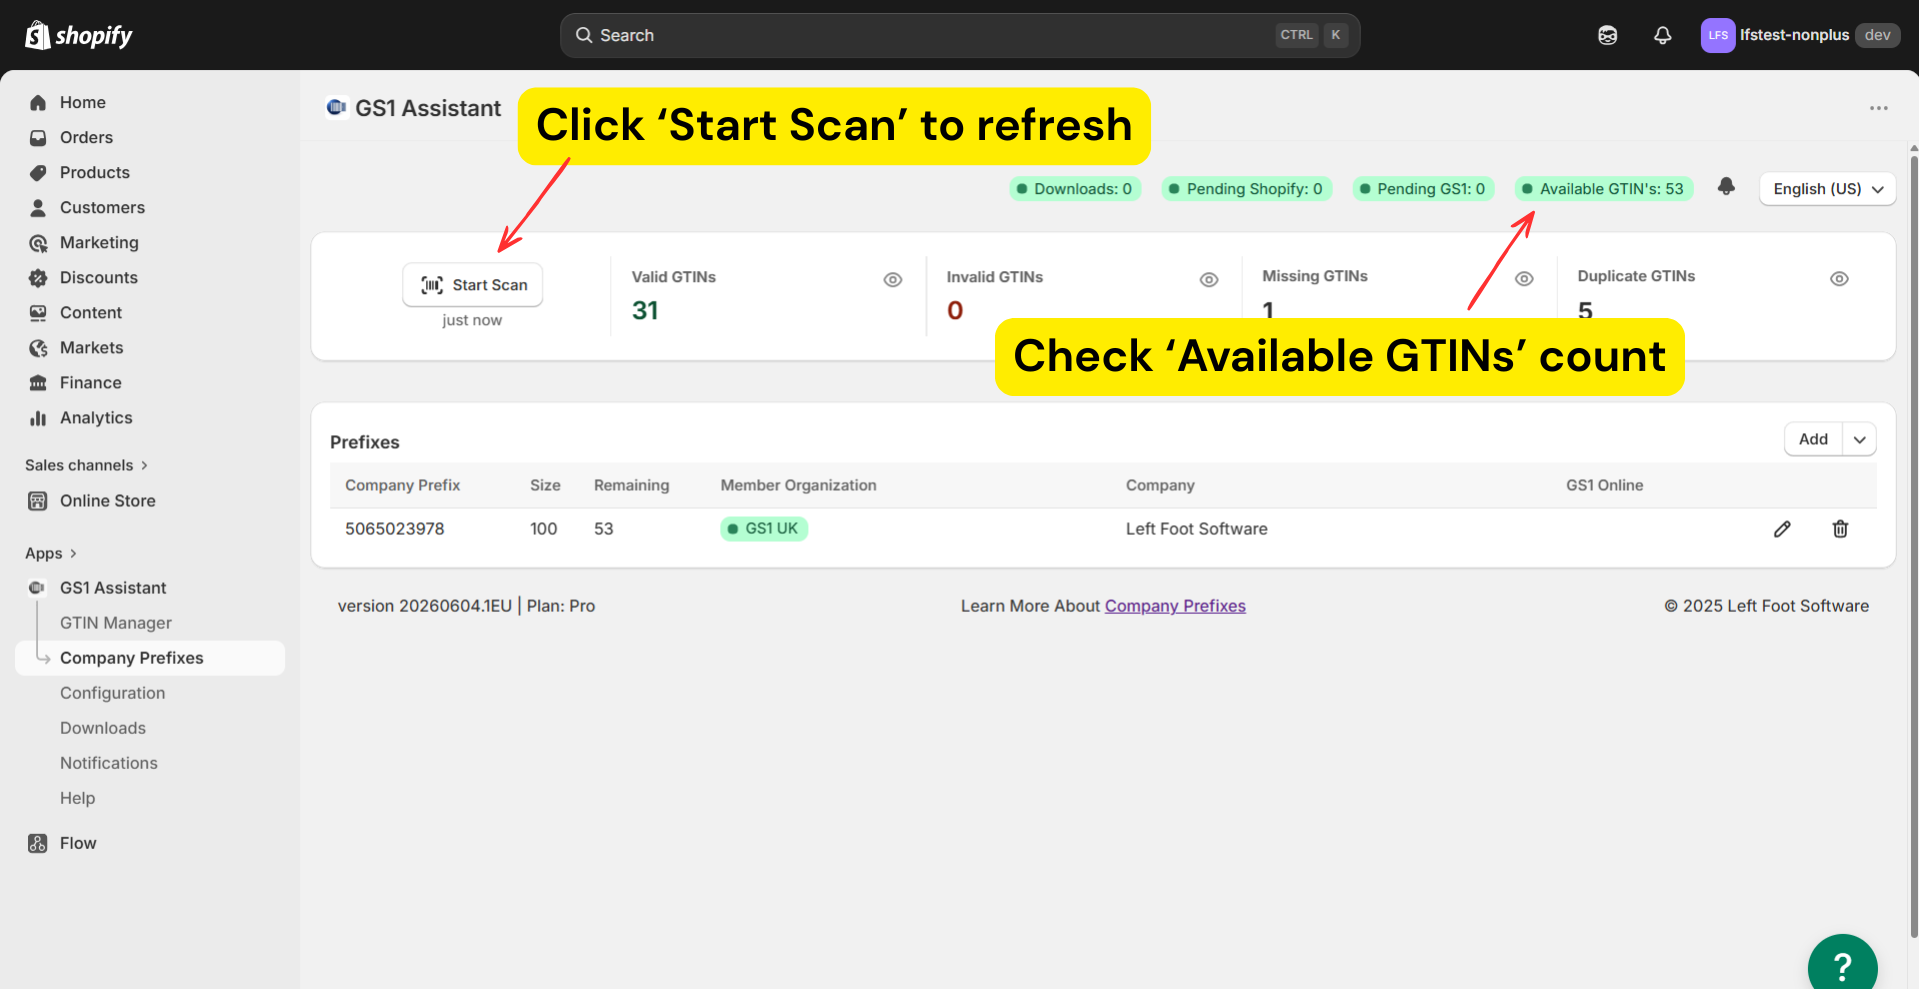
If the app runs out of available GTINs:
- assignment stops automatically
- remaining products stay unassigned
Note: If you're using Shopify Flow, the Available GTIN count does not appear to update automatically, refresh the dashboard before checking your remaining count.
Assign GTINs to your full catalogue
- Open the dashboard
- Click the Unassigned card and click Select All
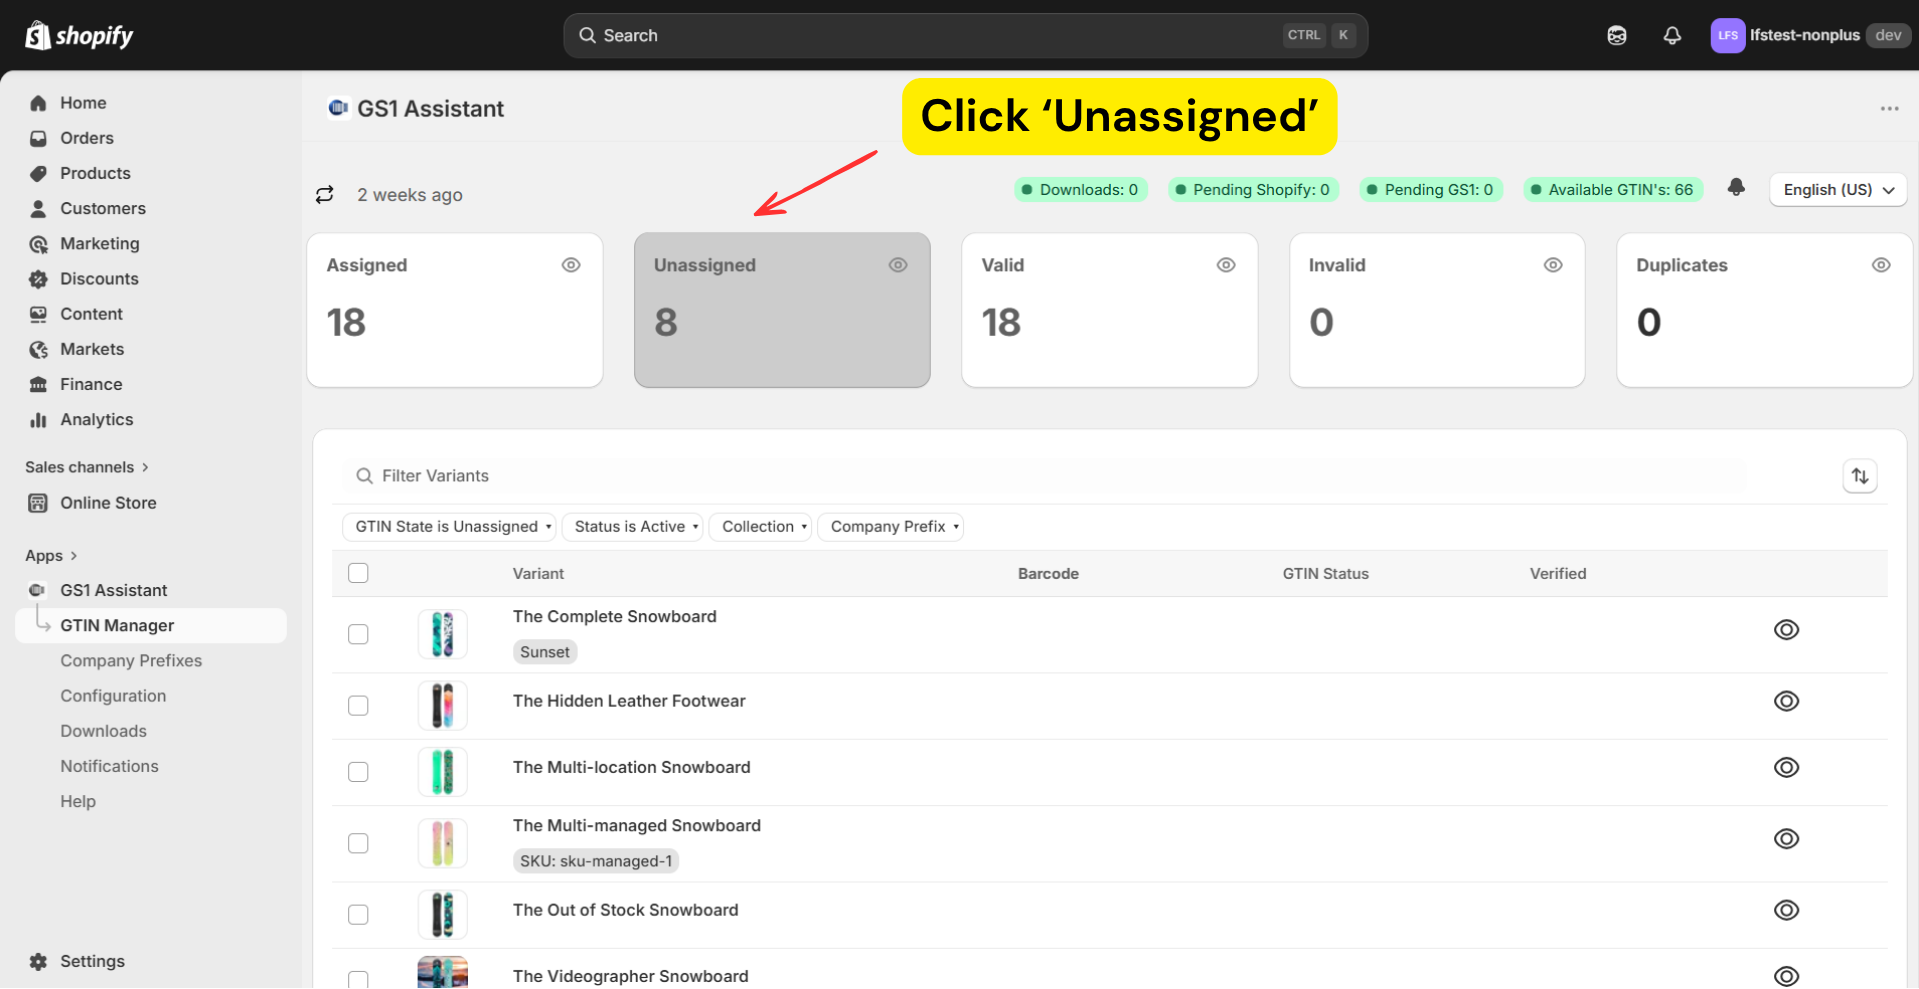
- Click Assign GTIN
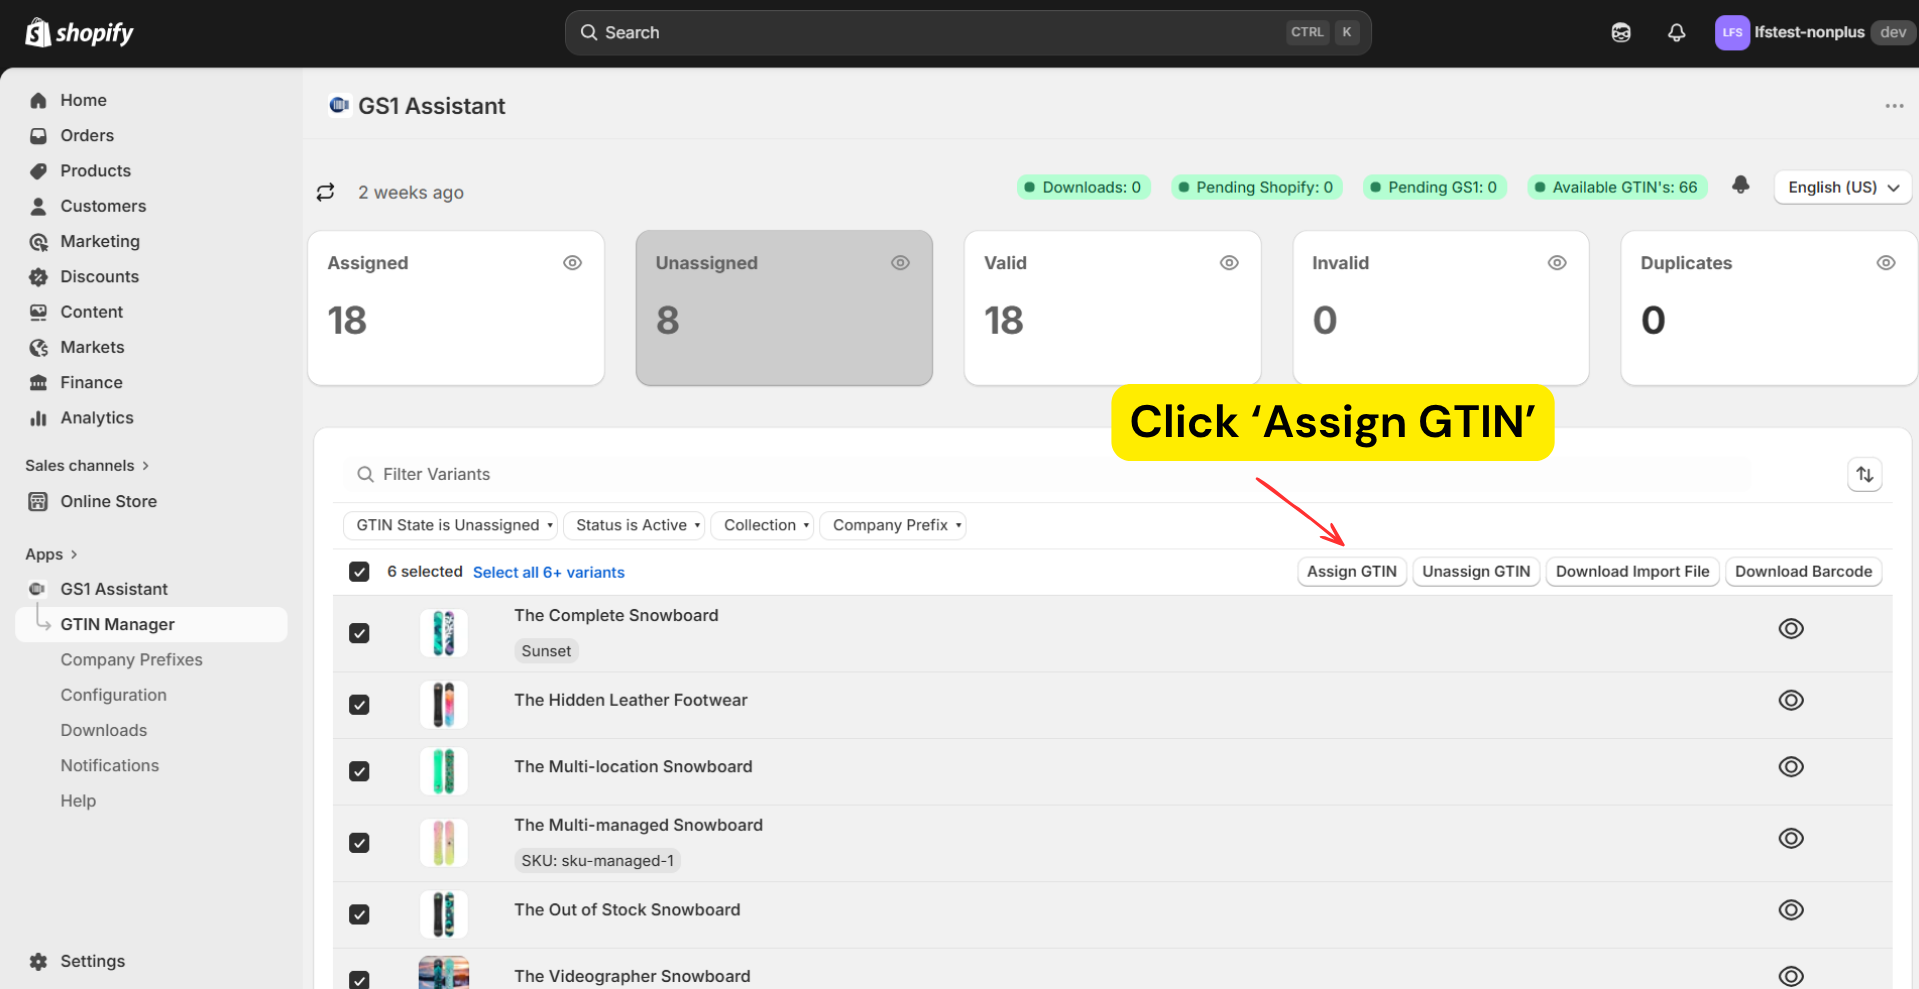
A Select Company Prefix box will open. Confirm the prefix and click Assign.
GS1 Assistant will assign GTINs to all selected variants.
Assign GTINs to specific products
You can also assign GTINs to:
- a product type
- a collection
- a keyword-based search result
To do this:
- Click the Unassigned filter at the top and select the product(s).
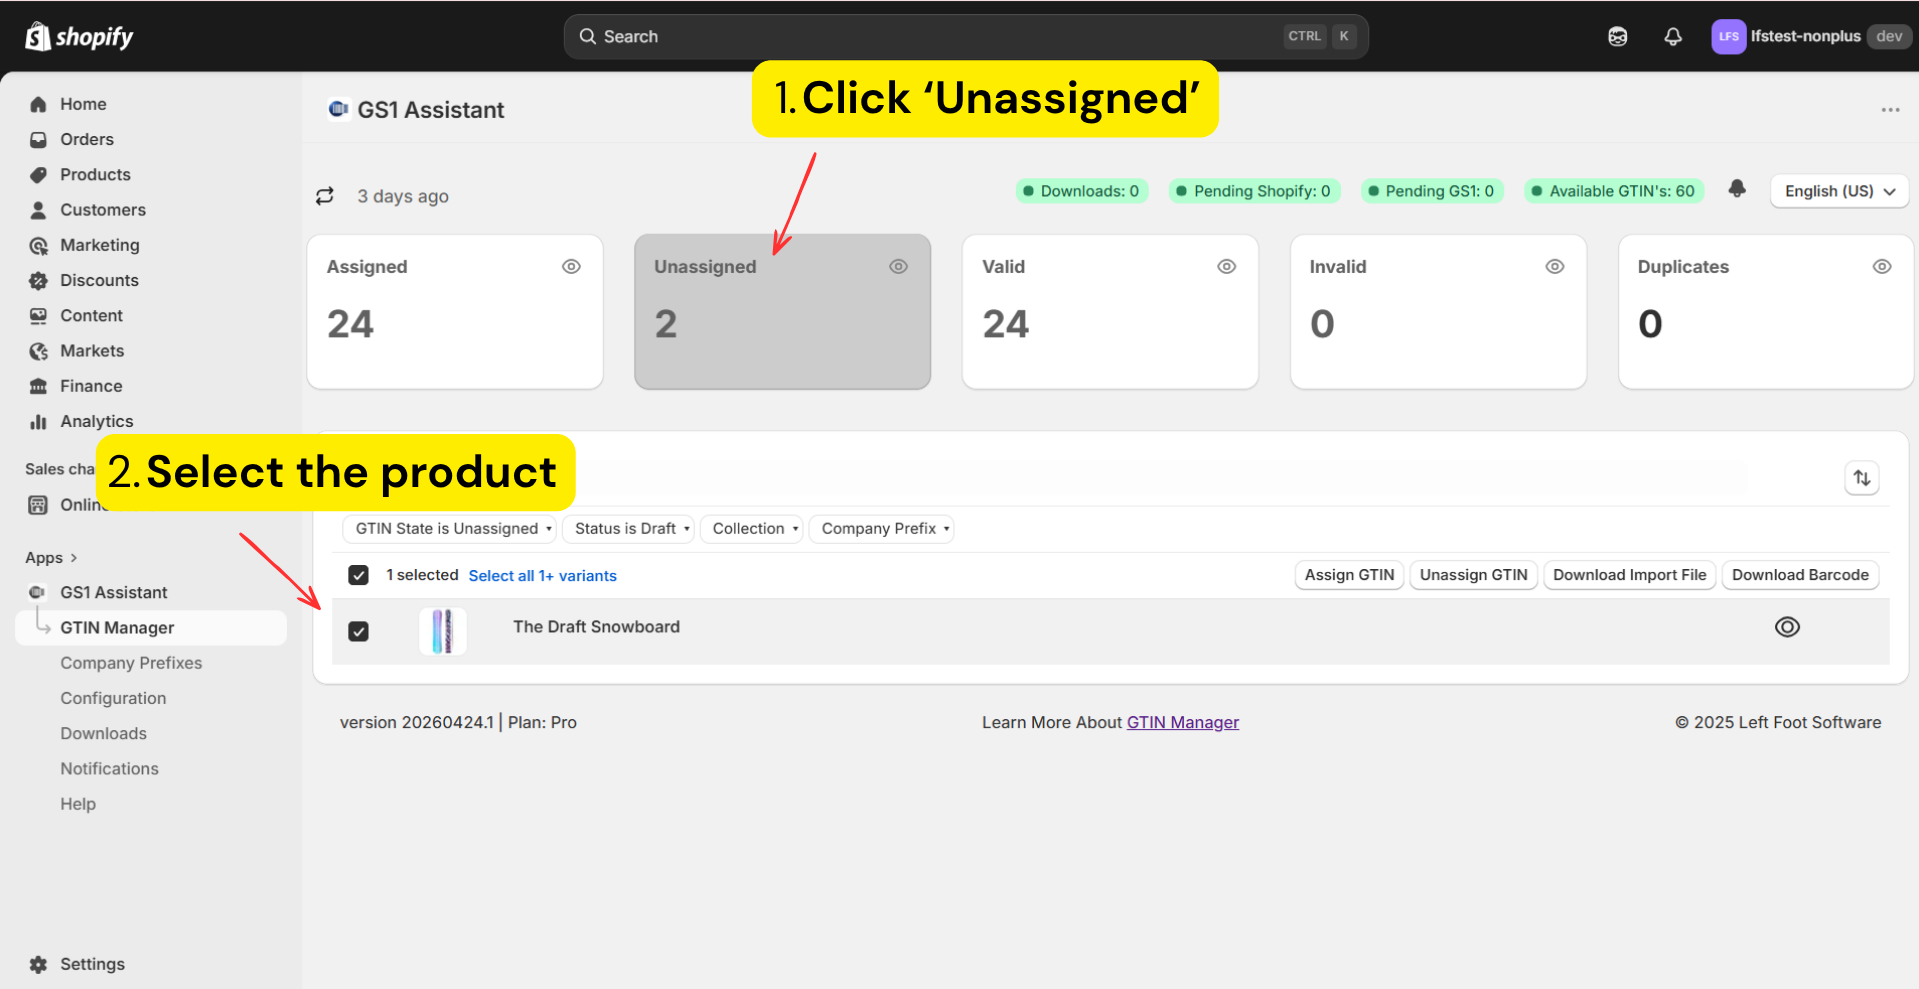
- Click Assign to assign GTINs to the products.
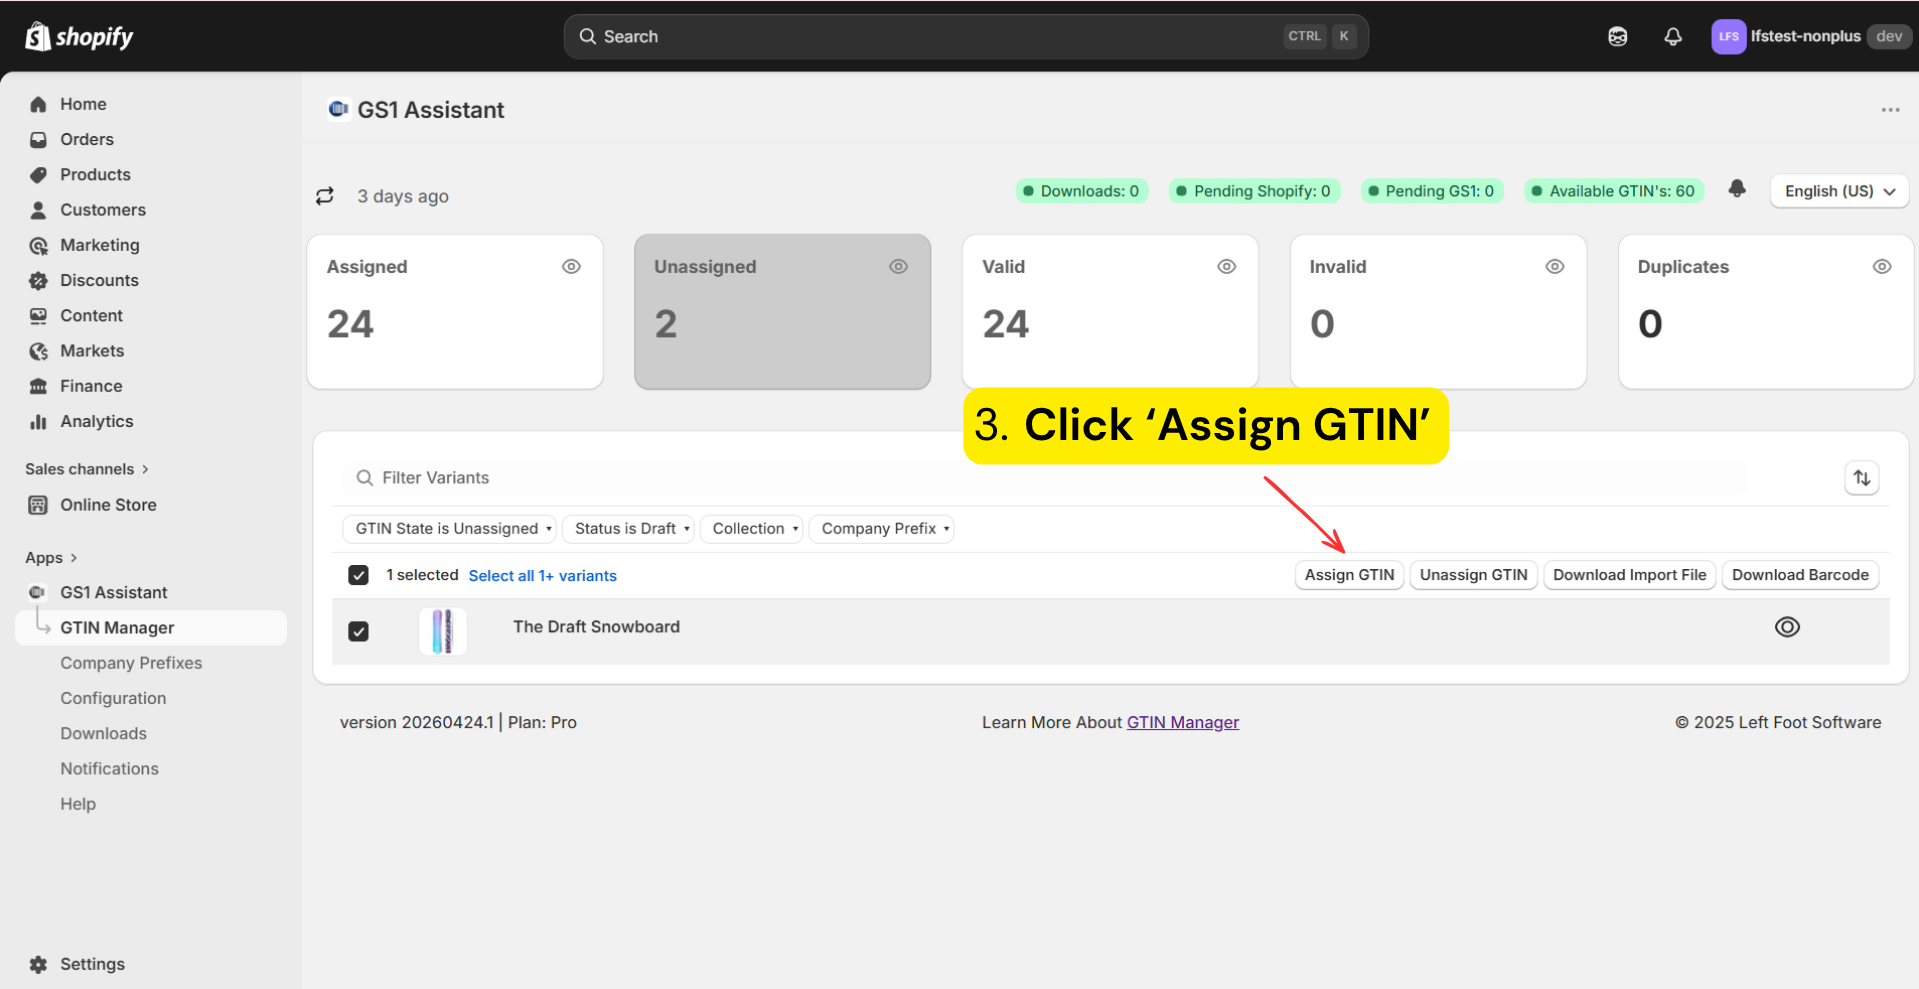
- A Select Company prefix box will open. Now click Assign.
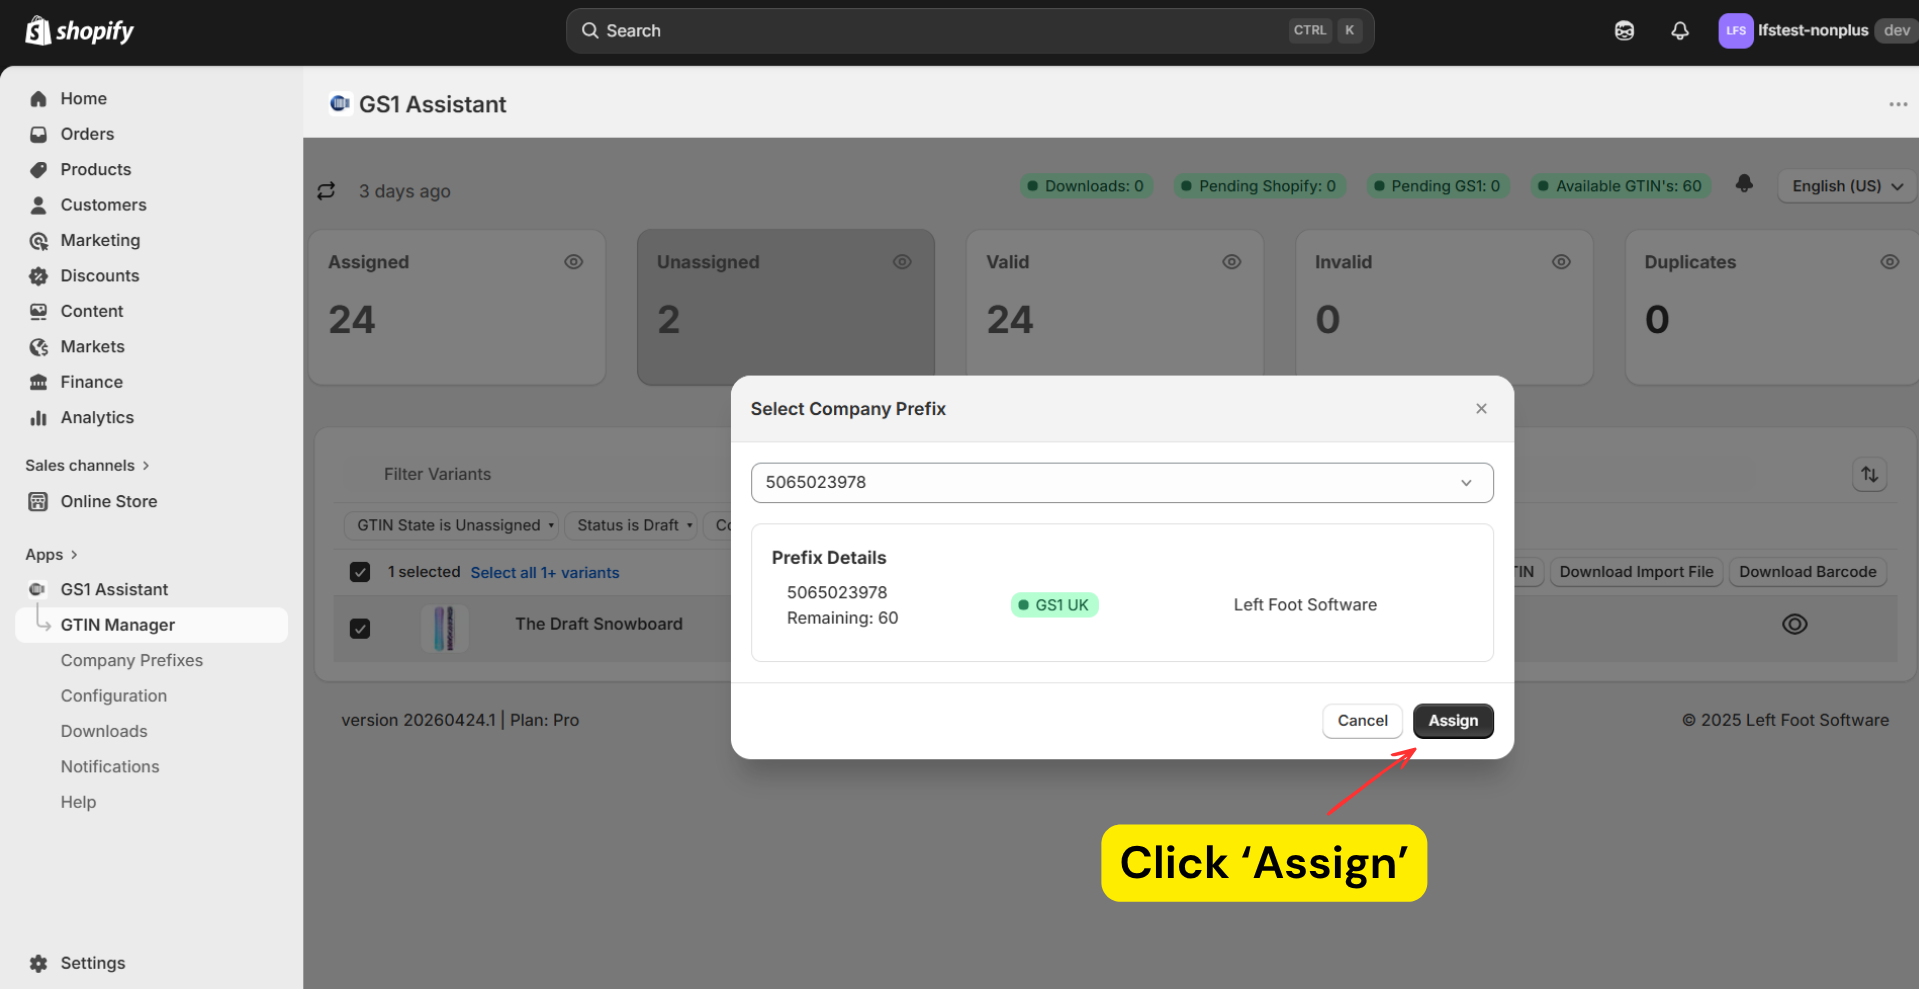
Now, the products will have GTINs assigned. The assigned variants will show OK status on the dashboard.
Large catalogues may take longer
Assignment speed depends on:
- catalogue size
- Shopify API response time
Large assignments may take several minutes.
If the dashboard does not update, wait a moment and click Refresh.
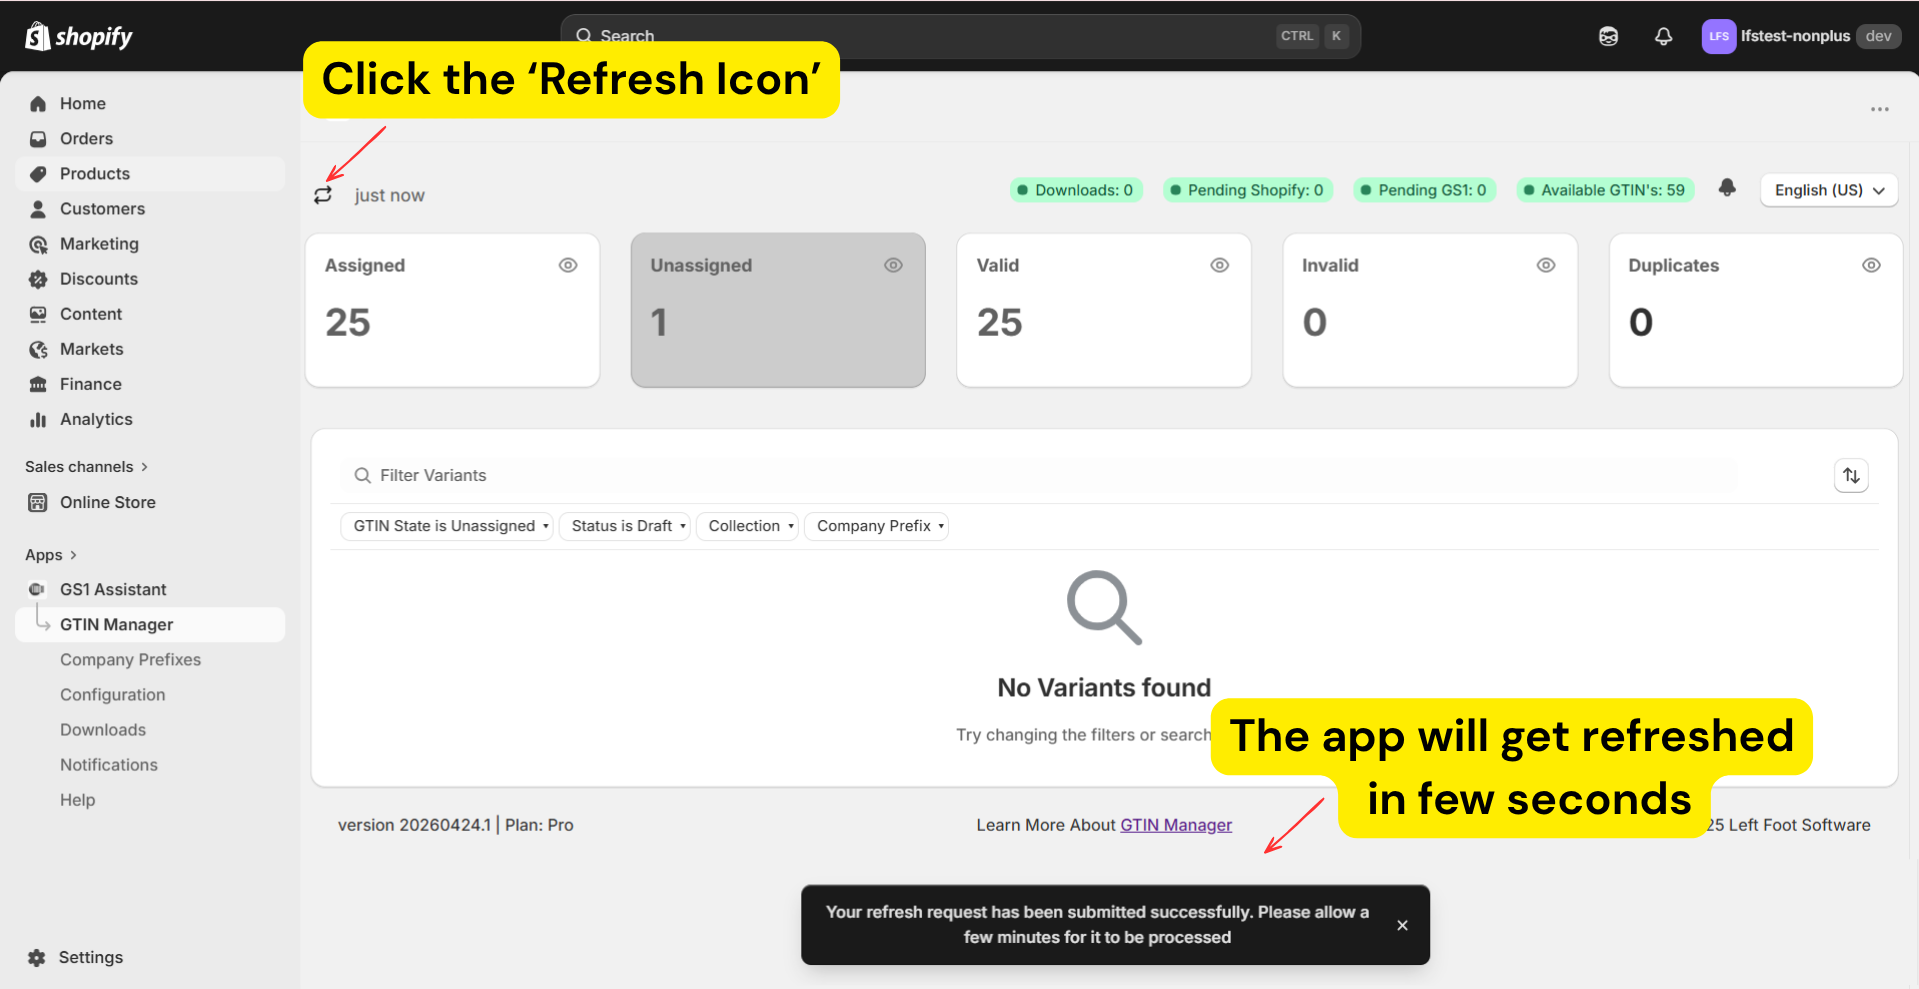
Do not click Assign repeatedly while processing is still running.
Automatically assign GTINs to new products
After your existing catalogue is assigned, you can enable Auto Assign. Auto Assign requires the Pro plan.
This automatically assigns GTINs to new Shopify variants as they are created.
Read: Auto-Assign GTINs for New Products