 GS1 Assistant - Help Document
How to Install, Connect, and Add Your Prefix
This guide walks you through:
- Installing GS1 Assistant
- Adding your GS1 company prefix
- Reviewing your product dashboard
- Getting ready to assign GTINs
Before you start
You need a GS1 company prefix before you can assign GTINs.
GS1 Assistant manages prefixes you already own. It does not generate or sell GTINs.
Don’t have a prefix yet?
Read: Before You Install: Do You Have a GS1 Company Prefix?
Step 1: Install GS1 Assistant
After installation, Shopify automatically opens GS1 Assistant inside your admin.
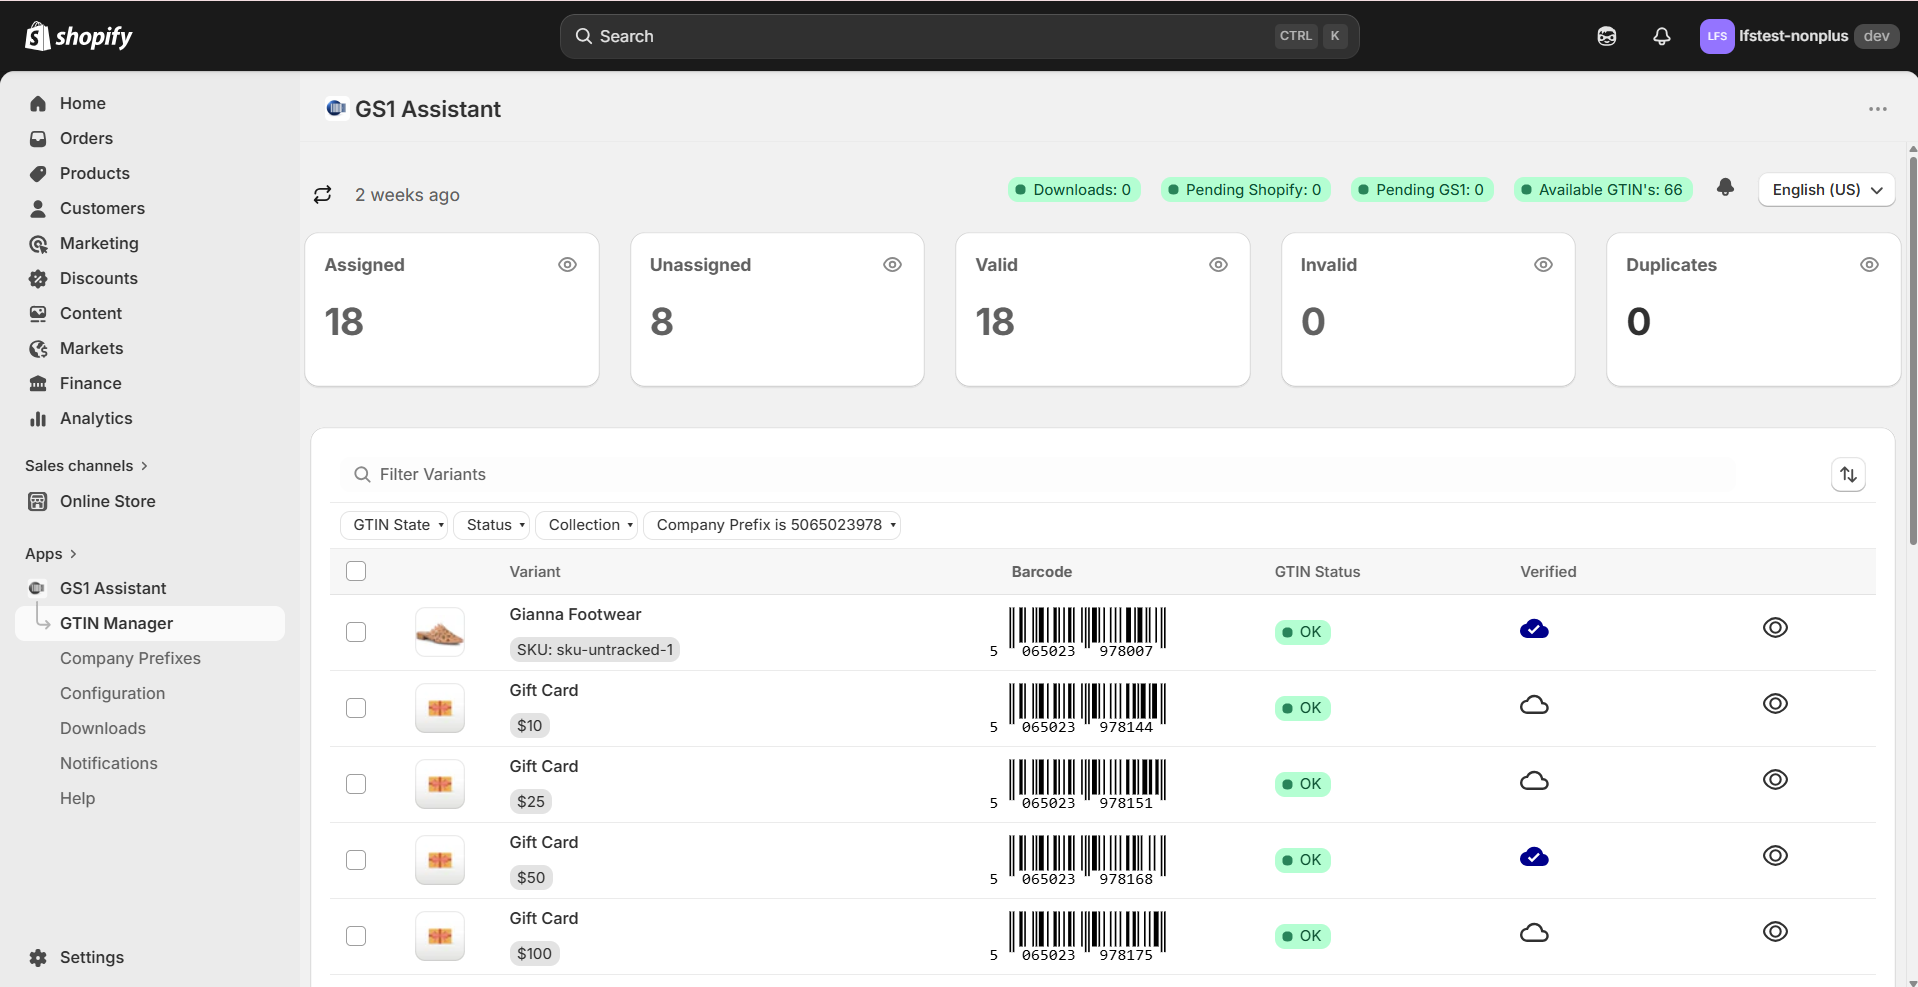
The app will immediately scan your store and load your product variants into the dashboard.
You do not need to add a prefix before this happens.
Step 2: Add your GS1 company prefix
Adding your prefix allows GS1 Assistant to start assigning GTINs.
Without a prefix, you can view products in the dashboard, but you cannot assign barcodes.
Option A: Manual entry (all regions)
Works for all GS1 organizations, including:
- GS1 US
- GS1 UK
- GS1 Canada
- GS1 Germany
- GS1 France
To add your prefix:
- Visit the Company Prefix page and click Add Prefix.

- Enter your company prefix and type the number without spaces, dashes, or other characters.

Or you can also add your company name instead of the prefix.

Note: GS1 US users
If your prefix appears as:
614141enter it as:
0614141The leading zero is required.
- Set your GTIN format. This determines the barcode length.
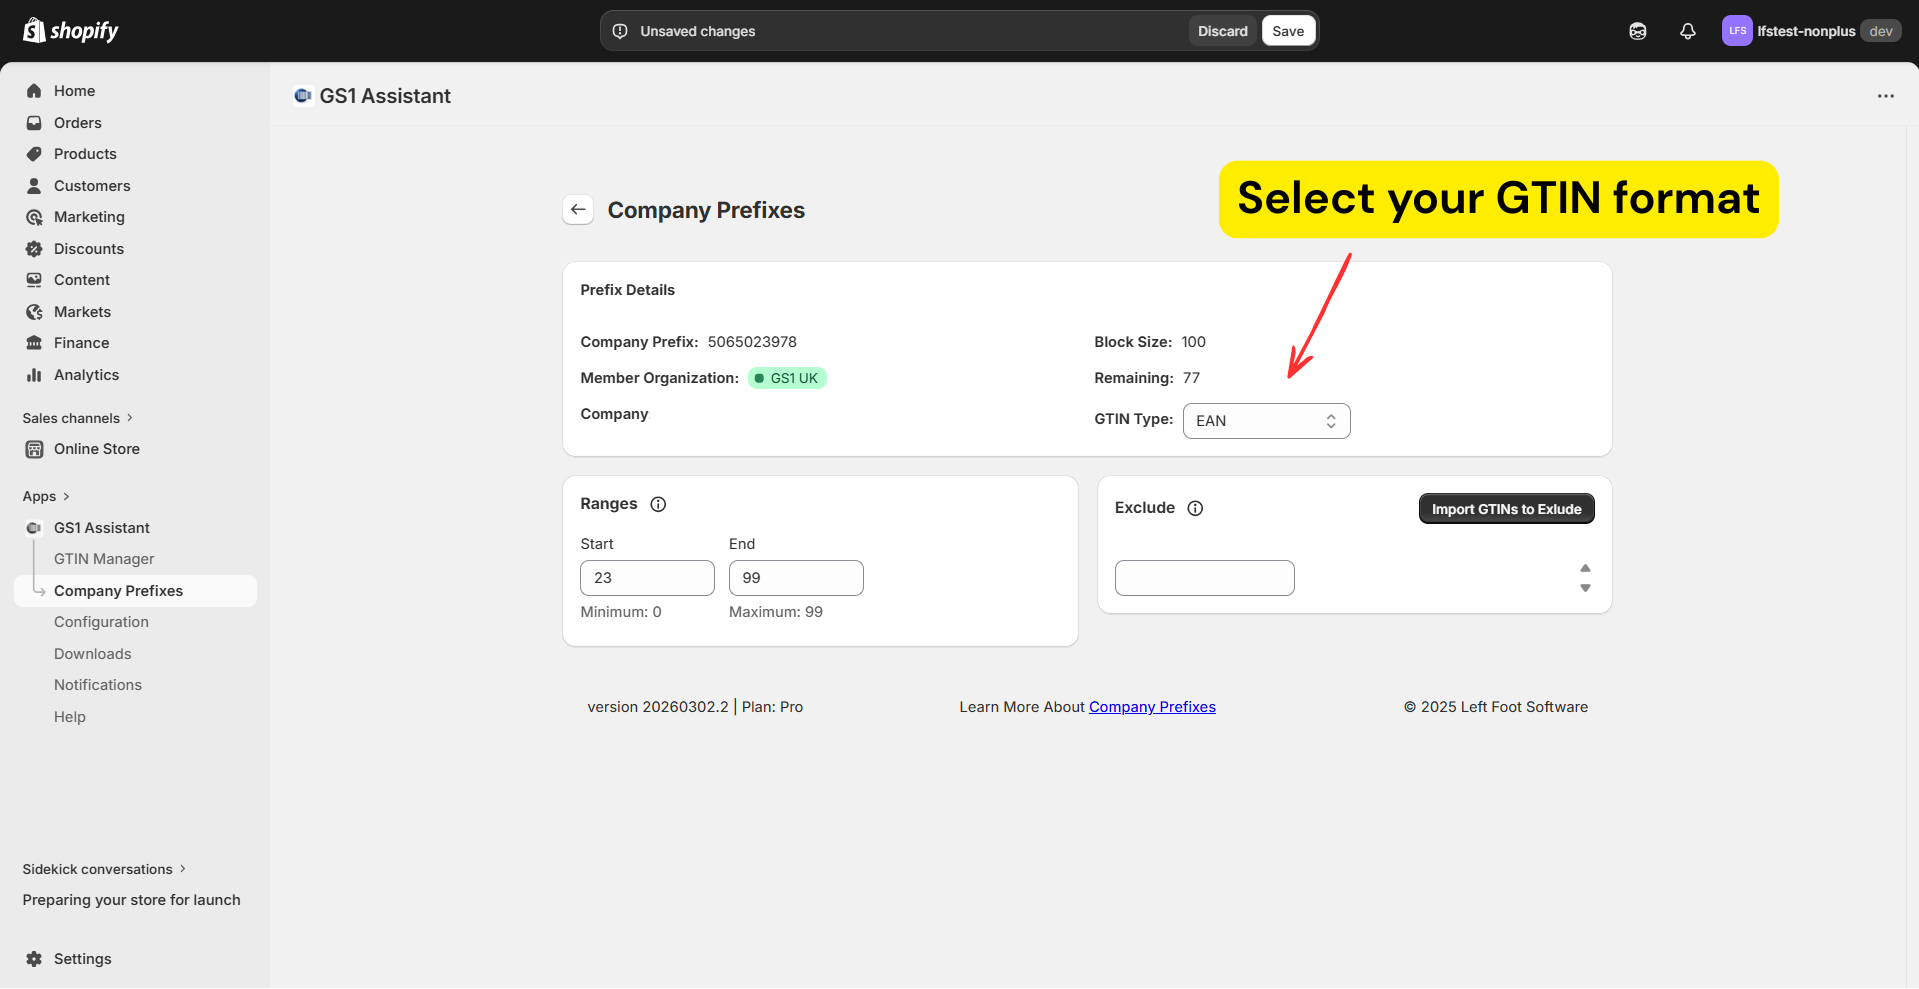

- Set the Start of Range. Enter 0 if this is a brand new prefix. If you’ve already manually assigned some GTINs from this prefix, enter the first unused position to avoid conflicts.

- Click Save. Your prefix will appear in the prefix list with a status indicator.
Here’s what the status colors mean:
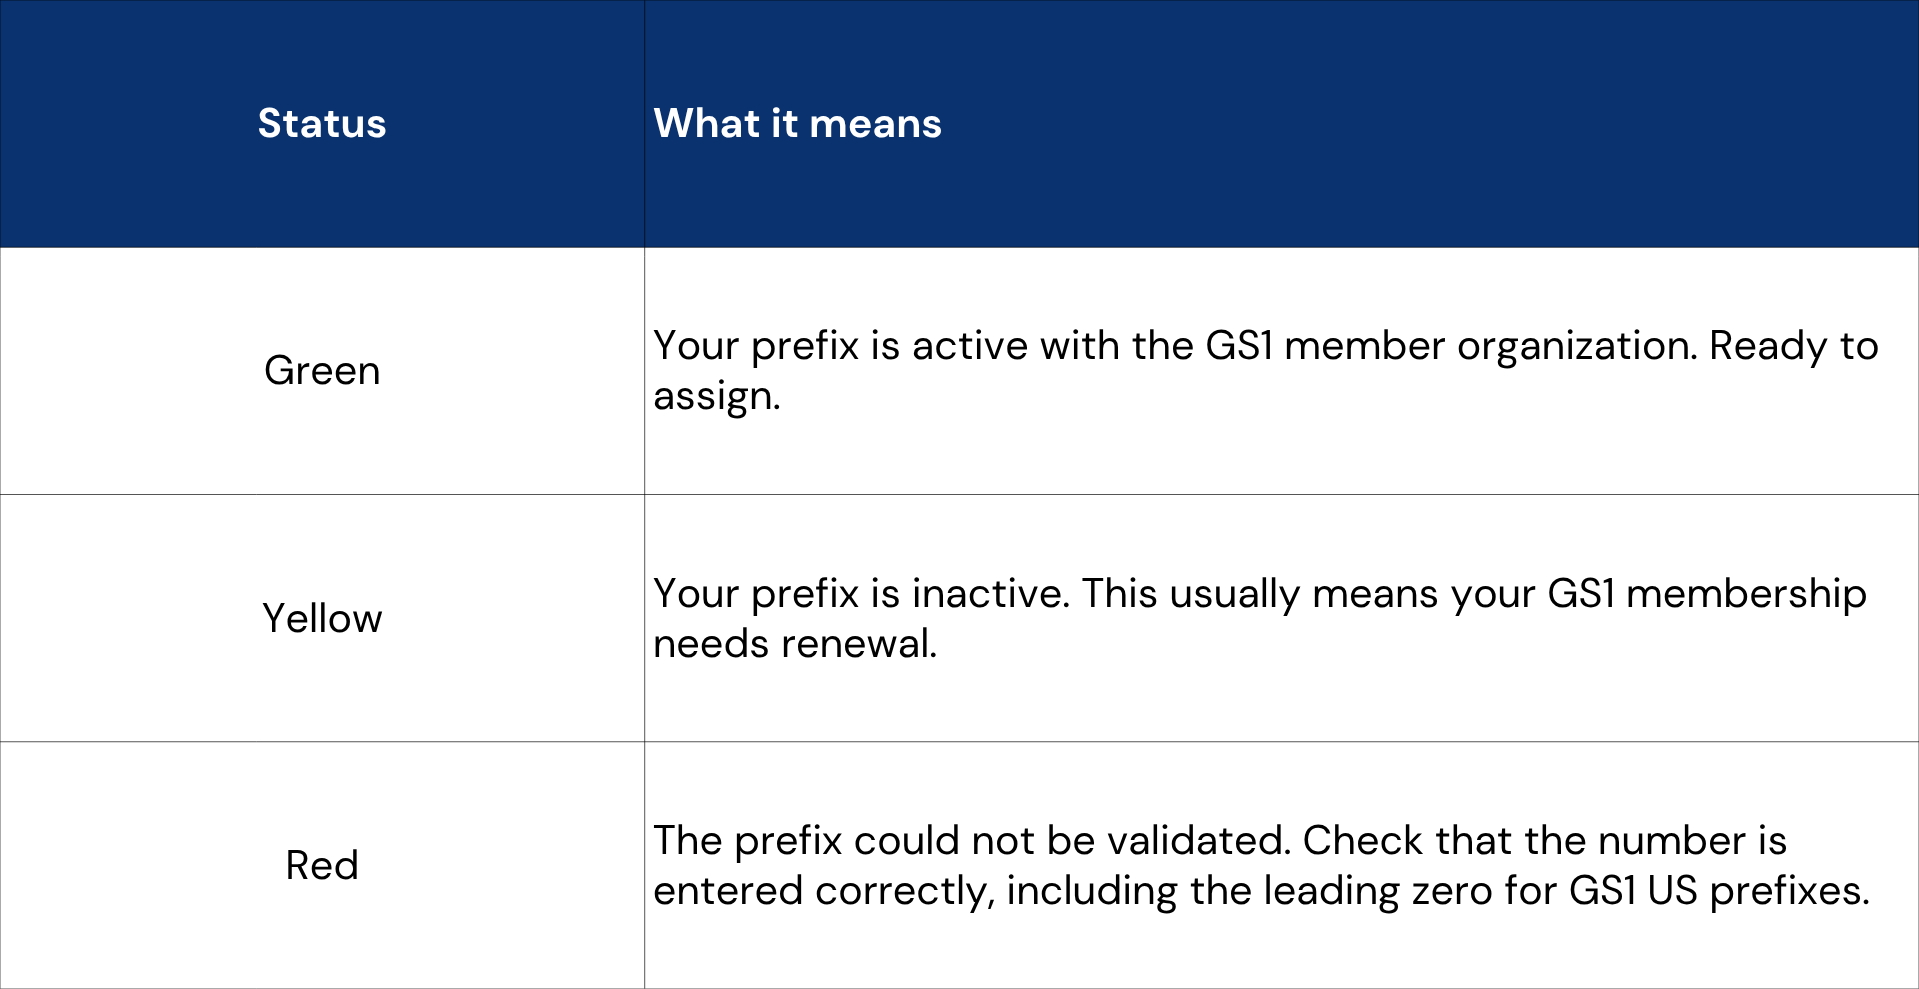
If your prefix was purchased recently, validation may take up to 24 hours.
If it still appears invalid after 48 hours, contact support.
Option B: Connect via API (GS1 Germany, Switzerland, Netherlands, Brazil)
Available for some GS1 organizations, including:
- GS1 Germany
- GS1 Switzerland
- GS1 Netherlands
- GS1 Brazil
You can connect your GS1 account directly from Settings.
If you don’t see the connection option, use manual setup instead.
Step 3: Review your dashboard
After adding your prefix, GS1 Assistant updates the dashboard and validates your barcode data.
Most products will initially show: Missing GTIN
This simply means the product does not yet have a barcode assigned.
If some variants already had barcodes before you installed the app, the dashboard shows their validation status:

If you see Invalid or Duplicate GTIN values, those barcodes already existed in your store before installing the app.
Read: Understanding GTIN Status: What OK, Invalid, Unassigned, and Verified Mean
Tip for large catalogues
If your product list looks incomplete:
- Wait a few moments.
- Click Start Scan to refresh.

Large stores may take longer to sync.
Next step
Your products are loaded, and your prefix is connected.
Continue to: Assign Your First GTIN to a Product